Saturday, April 24, 2010

FO: New Look 6470 Cowl Tank

New Look 6470 is one of the first patterns I purchased probably back in 2006... before I even took sewing lessons.  I took a stab at the skirt trying to teach myself how to sew... I didn't know there was a difference between woven and knit and that sewing pattern sizes are different than ready to wear sizes.  No wonder I was frustrated and decided to take sewing lessons a year later.

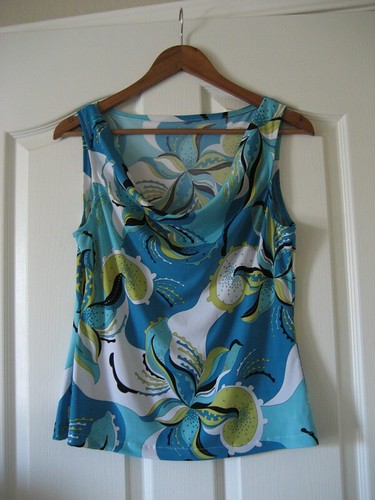
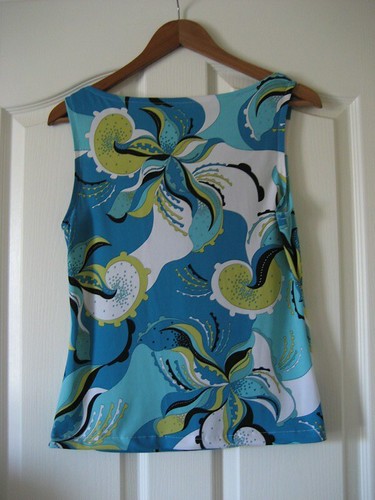
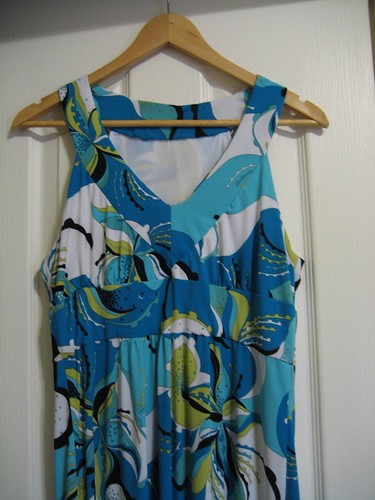
Well I didn't make or finish the skirt , but I did make view B, which is the cowl neck tank. It's only 2 pieces!! That's crazy!! :) This is a super easy tank, and I made it with the remnants from my recent Simplicity 3503 dress... yay for more stash busting. (I'm trying really hard not to acquire any new fabric and just use my huge stash... it's really hard with all the pretty fabric and spring inspiration.) I like how the two pieces fit on my left over fabric... I thought I wasn't going to be able to use it.

NL6470i.jpg
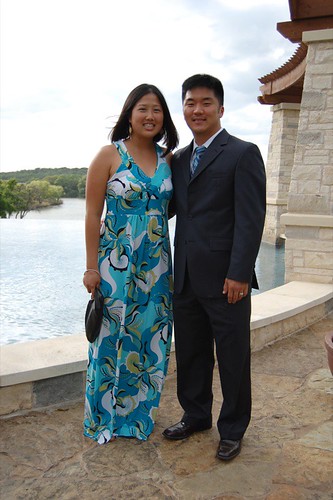
Picture taken at a church tennis tournament and it was super sunny. I was obviously not playing... I was the event photographer. :)

I would totally recommend this pattern. There are over 30 reviews of it on Pattern Review, and it's still available... it's not out of print based on the Simplicity website and some of the reviews are dated from 2005. I do want to make some of the other views, too.

Some notes on this pattern:
  1. I usually go one size down on Big 4 patterns, but based on the finished measurements I decided to go with my intended measured size. It is fit perfectly! Hehehe.. I guess they knew thing to two about a little less ease back then. :)
  2. The pattern does not have instructions to finish the raw edges. I don't mind this too much and it can be easily accommodated.  I did not spend the extra time to make the edges pretty because I wanted to finish before I went to bed. Overall, I think this pattern from tracing to sewing only took me a couple of hours to make.
  3. I love how versatile this top is! I can be dressy or casual.
  4. I added fusible hem tape to stabilize the fabric before I stitched.  I also added fusible hem tape to the neckline in order to keep the edge from flipping out.
  5. This is my SMOT #2!
IMG_0002.JPG

IMG_0003.JPG

Sunday, April 18, 2010

FO: Simplicity 4539 Top

I joined the Spring Month of Tops hosted by Faye. There are lots of great tops already posted on the blog. You should check out if you haven't already. Here's my first top for the month.

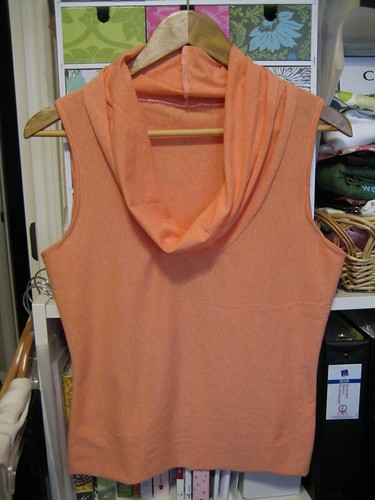
Pattern: Simplicity 4539 (out of print - OOP) view E
Fabric: from stash - melon spandex jersey from fabric.com @ $2.49/yd (ordered 3/25/08) Yay for stash busting!

IMG_2634.JPG

Below are some mistakes I made that could've been avoided if I went with my gut instinct.
  1. I read the cutting layout incorrectly and did not cut the front and back pieces on the correct grain. (i.e. there's no stretch across the width.) I even though I thought it was incorrect while I was cutting it, but didn't think to double check.  
  2. I put on the collar inside out. As I was pinning the collar, I thought that I should baste it first, but decided I was too lazy and just serged. (By the way, pinning fabric for the serger is different than pinning for the sewing machine... in case you didn't know. I don't want anyone ruining his/her serger.) I should've just basted, then I could of redone the collar.  From the picture above, you can tell that the collar seam will be visible from the outside.
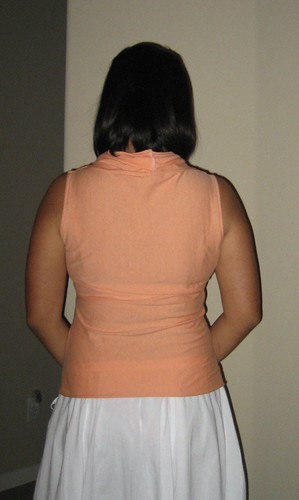
  3. Even though I pinned the collar, some of the front fabric bunched up along the collar seam. You can see it better in the picture below.
IMG_2635.JPG

Despite all the mistakes, I still like the shirt and will still wear it.  Because of the incorrect layout it's a little tight across the bust and back.  You can see how it pulls and bunches across those areas.

S453901.jpg

S453902.jpg

Below are changes that I made and some recommendations:

  1. I didn't hem the top. I have a rather short torso and I liked the length without it being hemmed. Next time, I'll lengthen the top and top it. If you have regular or long torso, I would definitely recommend lengthen the pieces.
  2. My side seams were only 3/8" because there was no stretch, and it was going to be a little too tight with 5/8" seams.
  3. I didn't hem the collar... just because I didn't think it was necessary and I was being lazy.
  4. Double check and make sure you're cutting on the right grain.
  5. Go with your gut instincts!! :)
I think it's a great basic pattern. There's only 3 pattern pieces to this view, and it's SUPER easy. I will definitely be making this again... maybe again this month. :)

FO: Simplicity 3503 Dress

I haven't really done much sewing lately... I've seen such great inspiration through many blogs and planned so many things to sew, but when it came down to actually making it... I just didn't want to sew.  There was a wedding this past Saturday and I didn't have anything to wear. So of course, Friday night I decided to trace, cut, and sew a dress for the wedding the next day!  :)

I used Simplicity 3503, which was 2009 best pattern on PR, and it's well deserved.  There's many great versions of it here.  I chose to make view E, which has good coverage in the back.

Pattern:  Simplicity 3503 View E
Fabric:  from the stash - Robert Kauffman knit from Hancock Fabric and nylon tricot from fabric.com

DSC_0958.JPG

I had a lot of firsts with this dress. I've listed them out below.
  1. I traced a Big 4 pattern. I usually just cut-out the tissue, but I need to grade down in size so I felt safer tracing the pattern. Also, I felt like I would reuse this pattern in the future and didn't want to ruin the original tissue pattern.
  2. I graded a size down. I bought this pattern awhile back... before my weight loss, and didn't have the size I needed.  I was really nervous about this, but it turned out pretty well. This dress was still a tad bit big, but I didn't mind. Since it was a knit, it was probably more forgiving of any mistakes that I made.
  3. I hand slip stitched the facings and linings. I didn't like the idea of hand sewing because I thought it was too time consuming, but it was actually therapeutic. The initial stitches weren't done correctly, but I eventually got the hang of it, and now I actually like to hand-sew! I never thought that I'd enjoy that process.
Some errors I made along the way:
1. Do not iron nylon tricot!  See this big hole (look below)?? I forgot that it was made out of nylon and put the hot iron directly on top of it... bad idea. Luckily it is on the inside and it isn't TOO big.

IMG_2639.JPG

2. Instead of using tricot, I should've used the fashion fabric.  I little bit of the tricot can be seen on the outside, but you have to look closely.

3. I would use a contrasting band like Eugenia's version.  I think that the band blends in too much with the dress... especially on the right side.

IMG_2642.JPG

Overall, I learned a great deal in making this dress. I surprised myself in finishing it, too, since I traced, graded down, cut-out, and sewed the dress all in less than 24 hours... I also got 7 hours of sleep.  I would definitely make this dress again, and I would recommend it to anyone that hasn't already made one. ^___^

I think I have a new perspective on sewing, too.  In the past I just wanted to finish an item and didn't really ENJOY the process of making it.  Hehe... I don't really know how to explain it... for example, I didn't like cutting out a pattern much less think about tracing a pattern. But much to my surprise, I liked every step in making this dress, and I think it's due to all the great sewing blogs I've been reading. They're so encouraging and helpful! Thanks! Hopefully, this is the beginning of getting back to sewing.

Sunday, March 21, 2010

My Prom Dress

With prom season around the corner there's talk about making prom dresses... whether it's a parent sewing for their daughter or someone sewing her own dress.  The Selfish Seamstress had a pretty awesome prom dress.  Click here to see hers.  Although I didn't sew my own dress my best friend and I did make ones out of duct tape.  :)  It was for this scholarship contest that we were planning on entering, but didn't.

Here are our dresses... the photo is the professional one taken at prom.  (I'm the one on the right. ^___^ )

I felt bad for my date because I ended up going around with my friend in our dresses rather than spending time with him.  (Sorry, DA!)  I wish I had close-ups of my duct tape dress because I did put a lot of detail into it.  There are ruffles on the asymmetrical hem of the dress, which was added inside the limo after dinner but before the dance.  I also made duct tape roses that were attached on top of my right shoulder.

I made this dress without knowing anything about sewing... there are no "seams" on the dress.  We made sheets of duct tape my taping my bedroom door.  Then we would carefully peel it off and then carefully tape another layer of duct tape on top (sticky side against sticky side).  Once we had this "duct tape fabric" we cut out our pattern pieces and pieced the whole dressed together on our own bodies while using duct tape to tape our "seams".  Once we got the look we wanted, we cut it down on of the side seams.  Does that make sense?  Hahaha.. this is difficult to explain.  After we had our prom dinner, all the girls helped us into our dresses in the restaurant's bathroom.  We needed them to help tape the side seam we had cut.  It was quite the experiment... but it brings back lots of good memories.  :)

My friend and I did wear "normal" prom dresses for before and dinner pictures.  Here is a picture of my normal dress... I'm the one in the coral dress.  I loved this dress, too!  It took me 5 months to find it... but I'm glad I did... I just wish I could still fit into it.  :)

Wednesday, March 17, 2010

Yarn On the House Winner

I won my first giveaway!!  :)  I won French Press Knit's Felted Slipper pattern and purple wool yarn from Yarn On the House.  I've been eyeing this pattern for some time now after seeing JadeBlade's awesome version.  I hope mine turn out just as cute.  Here's my free yarn.