Showing posts with label dresses. Show all posts

Sunday, June 13, 2010

FO: Simplicity 2886 - The Sundress

I made this dress to wear to my little brother's graduation. It's a nice cotton sundress that was perfect for the Texas heat. I think it looks like a little girl's (around the age of 5) dress due to my fabric choices. It's cute, but I'm not sure it suits me... it's growing on me and the husband likes it. I've already worn it out in public twice in less than 2 weeks so that's a good sign. This also the first completed item for my Summer Essentials Sewalong. :)

IMG_0496.JPG

Pattern: Simplicity 2886
Fabric: Amy Butler's Lotus Collection Lacework in brown (main) and pink cotton (contrasting) both of which were from my stash :)

IMG_0480.JPG

Modifications:
  1. No elastic in the back bodice... used 2 darts instead to remove gaping.IMG_0497.JPG
  2. Used bodice from view C and skirt from view A.
  3. Used a 2" hem allowance.
Recommendations:
  1. Sew the pintucks down... otherwise you'll it will look uneven and you'll have to iron it every time and it will still look like this:
  2. IMG_0498.JPG
  3. Don't wait until the end to insert straps like it says in the instructions.
  4. Be careful with markings and the curves.
  5. Pins are your friends. :) I don't normally use very many of them, but they definitely helped on this one.
Please ignore my funny facial expression. I did have a picture where I was smiling, but it looks like I accidentally deleted it thinking that this was the correct one... boo! There's also some wrinkling due to wear. :)
IMG_0537.JPG

IMG_0541.JPG

I love the pleating on the skirt, which isn't too noticeable with my busy print, and the pockets on this dress! I do recommend this pattern... it makes for a great sundress.

Currently in progress:
- Kwik Sew 2689... pieces cut out and partially sewn
IMG_0483.JPG

- Burda 02-2010-104... traced
IMG_0494.JPG

Sunday, April 18, 2010

FO: Simplicity 3503 Dress

I haven't really done much sewing lately... I've seen such great inspiration through many blogs and planned so many things to sew, but when it came down to actually making it... I just didn't want to sew.  There was a wedding this past Saturday and I didn't have anything to wear. So of course, Friday night I decided to trace, cut, and sew a dress for the wedding the next day!  :)

I used Simplicity 3503, which was 2009 best pattern on PR, and it's well deserved.  There's many great versions of it here.  I chose to make view E, which has good coverage in the back.

Pattern:  Simplicity 3503 View E
Fabric:  from the stash - Robert Kauffman knit from Hancock Fabric and nylon tricot from fabric.com

DSC_0958.JPG

I had a lot of firsts with this dress. I've listed them out below.
  1. I traced a Big 4 pattern. I usually just cut-out the tissue, but I need to grade down in size so I felt safer tracing the pattern. Also, I felt like I would reuse this pattern in the future and didn't want to ruin the original tissue pattern.
  2. I graded a size down. I bought this pattern awhile back... before my weight loss, and didn't have the size I needed.  I was really nervous about this, but it turned out pretty well. This dress was still a tad bit big, but I didn't mind. Since it was a knit, it was probably more forgiving of any mistakes that I made.
  3. I hand slip stitched the facings and linings. I didn't like the idea of hand sewing because I thought it was too time consuming, but it was actually therapeutic. The initial stitches weren't done correctly, but I eventually got the hang of it, and now I actually like to hand-sew! I never thought that I'd enjoy that process.
Some errors I made along the way:
1. Do not iron nylon tricot!  See this big hole (look below)?? I forgot that it was made out of nylon and put the hot iron directly on top of it... bad idea. Luckily it is on the inside and it isn't TOO big.

IMG_2639.JPG

2. Instead of using tricot, I should've used the fashion fabric.  I little bit of the tricot can be seen on the outside, but you have to look closely.

3. I would use a contrasting band like Eugenia's version.  I think that the band blends in too much with the dress... especially on the right side.

IMG_2642.JPG

Overall, I learned a great deal in making this dress. I surprised myself in finishing it, too, since I traced, graded down, cut-out, and sewed the dress all in less than 24 hours... I also got 7 hours of sleep.  I would definitely make this dress again, and I would recommend it to anyone that hasn't already made one. ^___^

I think I have a new perspective on sewing, too.  In the past I just wanted to finish an item and didn't really ENJOY the process of making it.  Hehe... I don't really know how to explain it... for example, I didn't like cutting out a pattern much less think about tracing a pattern. But much to my surprise, I liked every step in making this dress, and I think it's due to all the great sewing blogs I've been reading. They're so encouraging and helpful! Thanks! Hopefully, this is the beginning of getting back to sewing.

Sunday, March 21, 2010

My Prom Dress

With prom season around the corner there's talk about making prom dresses... whether it's a parent sewing for their daughter or someone sewing her own dress.  The Selfish Seamstress had a pretty awesome prom dress.  Click here to see hers.  Although I didn't sew my own dress my best friend and I did make ones out of duct tape.  :)  It was for this scholarship contest that we were planning on entering, but didn't.

Here are our dresses... the photo is the professional one taken at prom.  (I'm the one on the right. ^___^ )

I felt bad for my date because I ended up going around with my friend in our dresses rather than spending time with him.  (Sorry, DA!)  I wish I had close-ups of my duct tape dress because I did put a lot of detail into it.  There are ruffles on the asymmetrical hem of the dress, which was added inside the limo after dinner but before the dance.  I also made duct tape roses that were attached on top of my right shoulder.

I made this dress without knowing anything about sewing... there are no "seams" on the dress.  We made sheets of duct tape my taping my bedroom door.  Then we would carefully peel it off and then carefully tape another layer of duct tape on top (sticky side against sticky side).  Once we had this "duct tape fabric" we cut out our pattern pieces and pieced the whole dressed together on our own bodies while using duct tape to tape our "seams".  Once we got the look we wanted, we cut it down on of the side seams.  Does that make sense?  Hahaha.. this is difficult to explain.  After we had our prom dinner, all the girls helped us into our dresses in the restaurant's bathroom.  We needed them to help tape the side seam we had cut.  It was quite the experiment... but it brings back lots of good memories.  :)

My friend and I did wear "normal" prom dresses for before and dinner pictures.  Here is a picture of my normal dress... I'm the one in the coral dress.  I loved this dress, too!  It took me 5 months to find it... but I'm glad I did... I just wish I could still fit into it.  :)

Tuesday, October 27, 2009

Vogue 8413 Dress

I was flying out of town for my cousin's wedding Thursday morning so naturally I had to start and make a dress Wednesday night!  :)  I already had the pattern and fabric planned out.  The fabric was already pre-washed, but all the cutting and sewing happened Wednesday night after dinner.  I used Vogue 8413 view C.  The fabric was a berry ponte double knit from fabric.com.  This dress was less than $20 to make!  This dress was also part of my fall wardrobe (but not my PR wardrobe).

Pattern modifications:
1.  Removed the pleats from the front of the skirts
2.  Didn't use interfacing on facings
3.  Used an invisible zipper

I love this pattern and style!  It definitely needed a belt and I don't own very many.  I ended up going to Target the day before the wedding to buy a belt and a clutch.  They were perfect!  I think it was a good buy.  :)

IMG_0957.JPG

Because I was making it in a haste, I didn't finish my edges or hem the bottom of the dress.  I will need to go back clean those up, but other than that I love my new dress!  I received many compliments on this dress at the wedding despite my hap-hazardly construction.  See my side seams don't even match... I need to fix that, too.

Hopefully I'll have some pictures up later of the clutch and back of the dress, but I don't have any right now.

Monday, October 19, 2009

Vogue 1027 Dress

I made the Vogue 1027 dress.  It had many good reviews on PatternReview.  The fabric is a poly/lycra matte jersey from Joann.  I love the large geometric print and the jewel tones in it.

Here are a couple of changes  I made to the pattern based on others' reviews.
1.  Eliminated the elastic in the waist.
2.  Eliminated the sleeve facings (I serged the edges and did a narrow hem).
3.  Cut out extra pieces of the tie ends so the wrong sides won't show.

I ran into a few snags while working on this dress.  I didn't have a large enough area to cut out the pattern pieces, which made it a little tricky.  I also found it difficult to lay the matte jersey  flat, which is mostly like due to the size of surface area.  I normally make the pattern size that is one size down from what it should be based on measurements.  However, I didn't have the smaller size and made the size I "should've been" based on the pattern size chart.  The dress was rather large.  I took in at least 1.5 inches at the sides around the waist.  I also sewed the pockets in wrong.  I didn't think through the process and made the pockets go towards the back of the dress instead of the front.  I'm not sure how to fix this since I serged it to the bodice (oh well...).

I didn't like the dress at first.  It seemed too bulky around my waist, but it's grown on me and now I like it.  I just haven't decided on the length... I like it, but I wonder if I'd like it more if it was shorter.  I don't own any dresses that are this length so maybe it's something I just need to get used to.  Overall, I'm happy with my dress.  :)

Front:
IMG_0808.JPG

Back:
IMG_0812.JPG

I really like the pleats on the bodice. Bodice & tie detail: (Please excuse the awkward shot.)
IMG_0823

Review.

Sunday, October 4, 2009

Old FO - Butterick 5246

I finished this Butterick 5246 at the beginning of the year, but never got around to posting pictures or a review until now. This is only my second time wearing the dress and I still haven't decided if I like it or not.

IMG_0779.JPG

IMG_0780.JPG

Here are few of my dislikes:
1. The wrong side of the ties can be seen. This could be a pretty easy fix, but I didn't have enough fabric to fix this.
2. The cowl part isn't as big as I thought it would be.
3. The wrong side of the cowl can be seen if it doesn't lay perfectly.
4. The gathering at the center front under the bust is a little too poufy.

Despite all of the above... I still kind of like it, but I definitely don't LoVE it. Oh well... I'll probably wear it a few more times. Here's a full review.

Here's detail of the cowl neck.
IMG_0784.JPG

Tuesday, July 28, 2009

Beach Dress M5621

More vacation-wear. I really like the way M5621 turned out! More details below.

=Beach Dress: McCall's 5621=
Many of the reviews said that the dress was short and one of them said that the arms were a little tight for view B. I placed the pattern pieces on myself to get a generally feel for the length and thought that it was do-able so I didn't make any alterations... since I was also thinking of using it as a swimsuit cover-up I didn't mind it being a little bit shorter. I meant to use a smaller seam allowance in the arms to make a little more room, but I forgot to so it is a little tight in the arm area. (Hopefully I can tone down my arms a little more.)

I used this cotton cambric from fabric.com for the main part of the dress. It's a little thin but it's perfect for a cover-up. The neck edging is a white Kona cotton from my stash.

The neck edging for view B (and A) was a little tricky for me. I think I just needed to take my time and go at slowly... I really like the look of it. There are a lot of designer versions of this dress... like the from Trina Turk. (The picture is from Nordstrom's.)


Here is the line drawings for the pattern.


Some alterations/deviations from the pattern...
1. Used french seams for the side seams.
2. Did not use interfacing on the neck edging since the Kona cotton was much heavier

Overall, this dress was a super cute beach cover-up. The neck edging was a little bit wonky but I didn't mind too much. By my measurements, I'm a size 14 but I went down to a size 12. I could still easy pull it on and off... it was just that the arms were a smidge tight.

In front of a shop on Grand Cayman... it was very bright!
M5621PiratesScanned.jpg

Dress on hanger:
M5621HangerSml.jpg

Neckline detail:
M5621NeckDetailSml.jpg

Full review here .

Evening Dress & Clutch

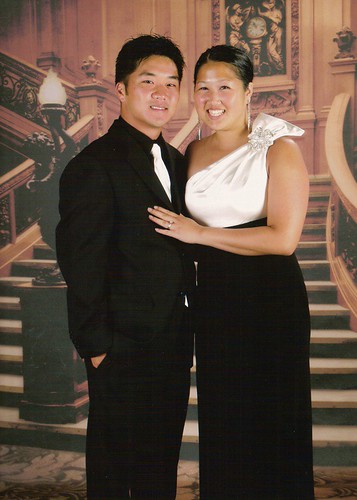
I didn't have any floor length evening dresses for the cruise we took. I looked around the stores to buy one, but they were all short. :( I ended up buying one from Cache for $200... which was more than I wanted to spend. The saleswoman said they only had one floor length dress and what do you know it was in my size. When she handed me the dress I thought it was just ok. When I tried it on, it fit like a glove and looked so elegant... so of course I had to buy it.

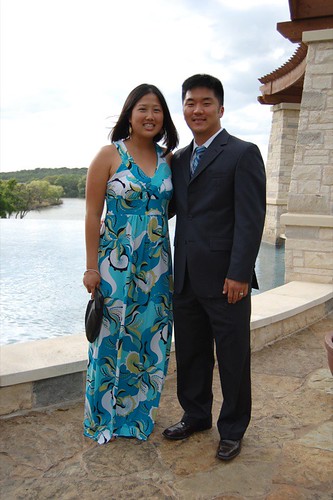
This was taken on the cruise by one of the photographers... classic Titanic scene.
fomalday1scannedpicsml.jpg

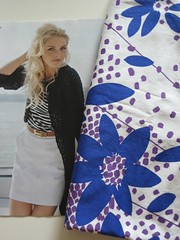
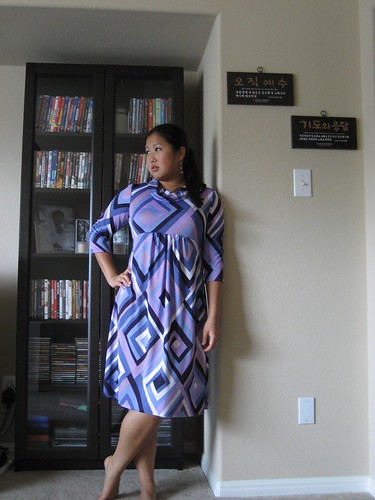
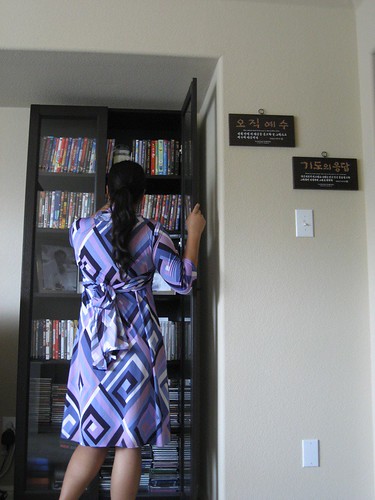
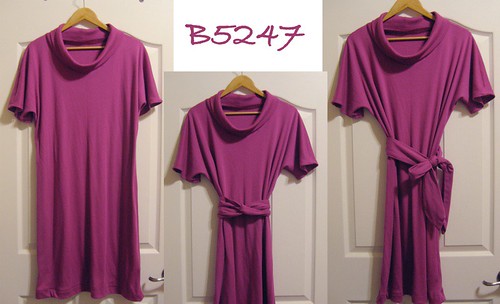
Well... there were 2 formal nights on the cruise. I had a dressier short dress I could've worn but I wanted another floor length dress. A couple of weeks before the cruise I bought 3 yards of purple stretch satin to make into a formal dress. I'm not sure why I only bought 3 yards though... most patterns required at least 4 or 5 yards. With less than a week left before the trip and only 3 yards for fabric, I turned to Vogue 7848... I decided to make a matching clutch with the leftover fabric, too.

= Strapless Dress #2: Vogue 7848 =
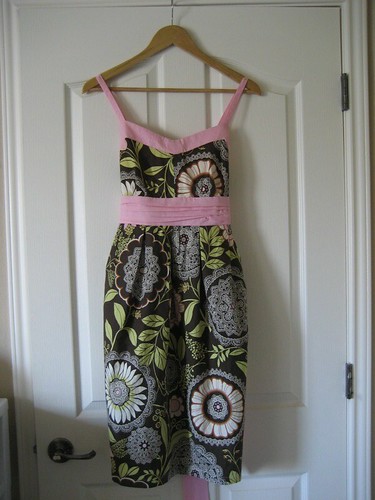
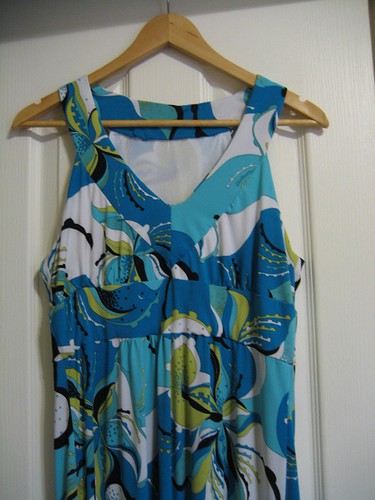
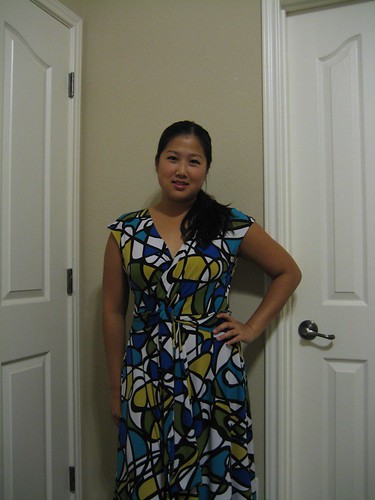
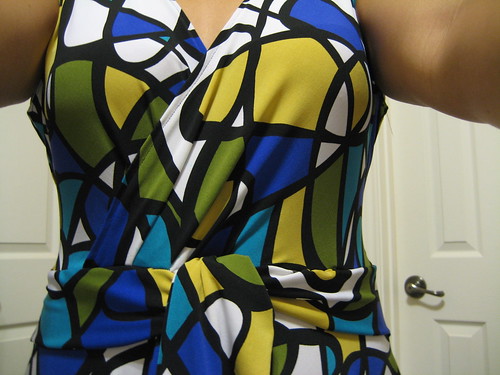
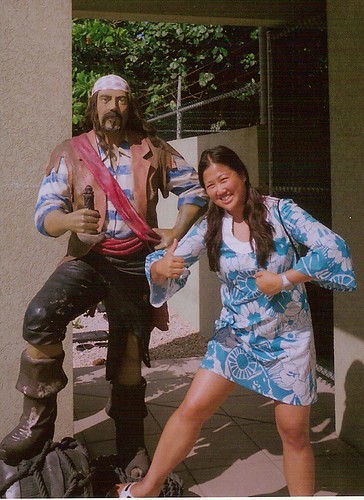
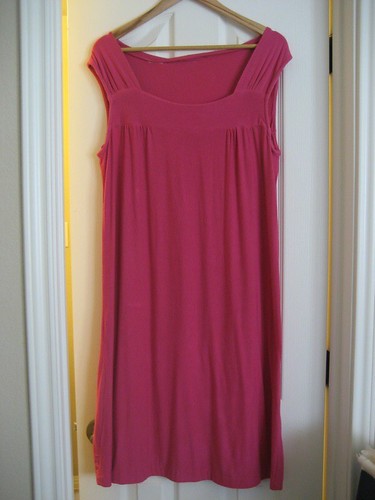
I had just finished this dress in the blue cotton print and it fit very well. I don't think you can tell it's the same dress!! The pattern came with a floor length, but it only came up to my ankles (and I'm not very tall... 5'4"). I used view C, which was the same view as the short version but used the floor length hem. Here are some alterations:

1. Added about 6" to the bottom of all the pieces (When I had sewed all the pieces together they were varying lengths... hehehe... as you can see I was very technical.)
2. Used an invisible zipper
3. Used fusible hem tape. Since the satin was so slippery, I had trouble hemming the dress. I used fusible hem tape first and then went back to sew the hem.
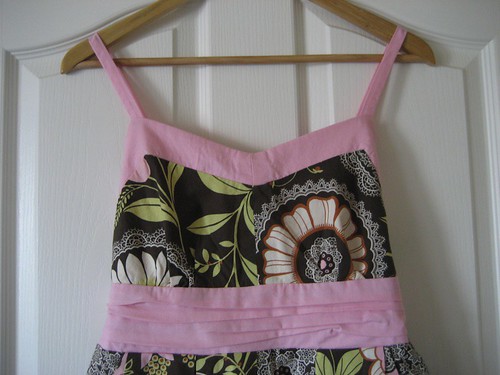
4. Added a satin ribbon like view B. I just eyeballed where the ribbon should go and sewed it in the side seams. I wasn't going to sew the ribbon in, but the ribbon and dress were easily sliding against each other.

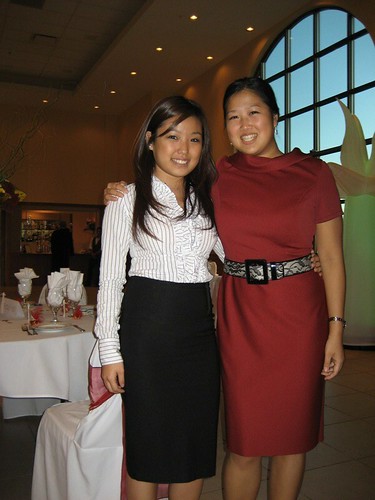
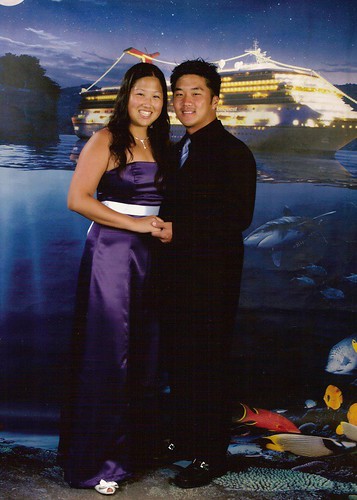
Overall, I'm very pleased with the result. The length was perfect with my heels as you can see below.

This is a formal picture taken on the cruise... but you don't get a very good view of the dress. Another "must" cruise scenery...
SmlFormalPicScan.jpg

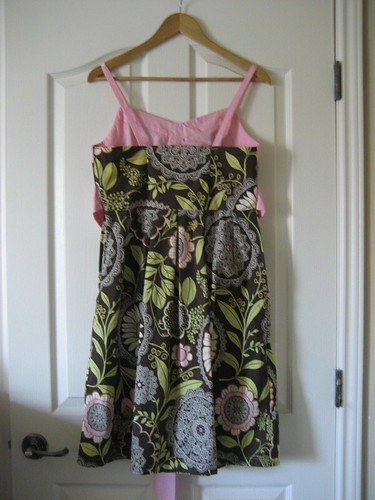
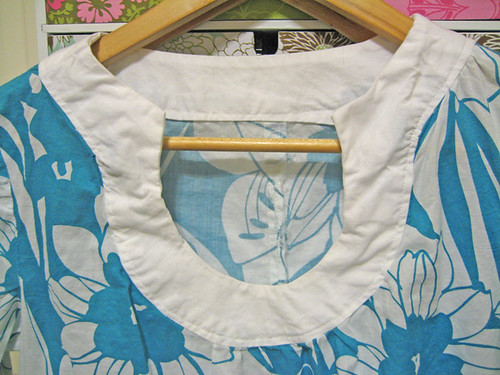
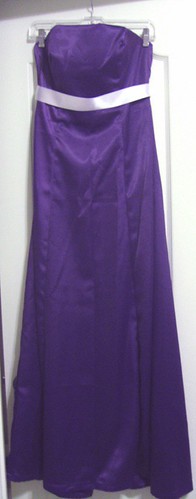
Here is the classic hanging on the hanger picture...
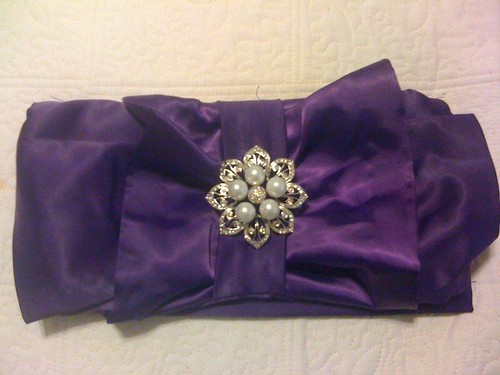
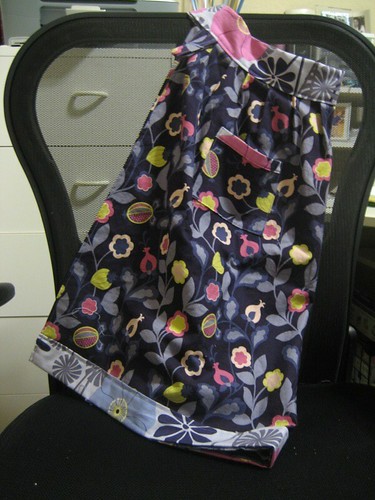
V7848EveningFullSml.jpg

= Ruffle Clutch =
I used the How-to for the "Gold Ruffle Clutch" on BurdaStyle. Overall it was pretty easy to put together. I just struggled with the slippery satin and the fact that it didn't like to iron very well. The clutch definitely needed a brooch and I had the perfect one. (The brooch is from Hannah D's.) This was such an elegant, perfectly matching clutch.

This picture was taken on my phone so please excuse the quality of the picture...
photo

Monday, July 27, 2009

Vogue 7848 Strapless Dress

I finished this dress before the cruise but in between finding pictures and taking another week off and work, it's been pretty hectic.

This is the first item in my summer mini-SWAP. Overall, it was pretty simple to make and very flattering. Based on everyone's review, I went down a size from my pattern measurements (which I normally do anyway for the "Big 4") and it fit almost perfectly.

I had some problems with the invisible zipper... the first zipper was just a bad zipper, but I didn't figure it out until I had already ripped and resewn it about 3 times. Once I realized it, I had to run to Hancock and buy another one... UGH! I was so annoyed. Bad, zipper, very bad...

One of my goals this year was to have neater finishes on the inside... I wasn't sure how to apply that to this dress... here were the problems I was running into:

1. There were a lot of curves due to the princess seams so french seams didn't seam right.
2. Seam binding was a little too bulky for such a fitted dress.

In the end, I only applied seam binding to the seam with the zipper and then to the bodice lining. The rest I just zigzag stitched. Oh well... this should get me by for now.

The only thing I didn't like was that you could see the bottom edge of the facing when it was on. It's such a fitted dress that any bulk on the inside shows. I may take off the seam binding and just do a zig zag stitch to reduce the bulk.

This is my first time "posing" for a picture for something I made... it was a little awkward. It was also a random staircase on the cruise that everyone was using.

IMG_9283.JPG

This is a better view of the front... my hubby and I and our waiters. Our waiters were super nice! ^_^

IMG_9329.JPG

Full review

Wednesday, May 27, 2009

Upcoming Projects

I cut out the fabric for Vogue 7848 I need to pick up a couple of things before I can finish this dress. Here is a picture of all the pieces pinned together. It doesn't look very good like this... I want to sew it! This is will be the first item of my mini-SWAP.


I ordered a designer sampler for quilthome.com. It's called Sugar Snap and it's so pretty. I'm going to make a quilt for halmuhnee (which is Korean for grandmother). They're so pretty.

Wednesday, December 10, 2008

Rest of the Fall Semester

A little bit of sewing... lots of studying and working... good eating for Thanksgiving and our 3rd wedding anniversary!

= V1062 Cropped Jacket =
This was my first jacket and my first time using fleece. (This month was a lot of firsts!) It was super easy and it was unlined. I tried to add pockets, but it was too short to fit them in anywhere.

V1062 A.JPG

Full Review Here

= B5247 Cowl-neck Knit Dress =
I made these dress and wore it out to our 3rd wedding anniversary dinner. I love the way the belt is tied, which was an idea stolen from the envelope cover. (It is the middle one in the picture below.) I realized that all my recent dresses are hot pink. I need to stay away from that color for awhile... Here is the final product...

B5247 Composite.jpg

Full Review Here

September Catchup

Wow... I'm sooo behind in blogging! Well my semester has finally come to a close. It was a long, tiring, hard semester and I'm so glad that it's over. I have about a month before it all starts up again. Here's some things I made in September...
= NL6828 Knit Dress =
This was my very first knit and was very intimidated by it. It came out better than expected and now I LoVE sewing knits! It's so easy and so fast.

Here's a pic of it on the hanger:
NL6828 Hanger.JPG

It needed a belt because it was very unflattering without it. Here's a pic with a belt.
NL6828 On.JPG

I love this dress! It was very easy and I wore it out to a wedding and to church and to work. =) Full Review Here

= Shirred Dress =
I used Sandi Henderson's tutorial to make a long shirred dress. The tutorial was easy enough to follow along, but I think the fabric I used made it difficult to work with. I just used 100% polyester satin. This was the first time I've sewn with satin or any slippery fabric. Overall it was a nice easy long dress. I wore it to a wedding rehearsal dinner.

Shirred Dress.JPG
PDF Tutorial

= Wedding Gifts =
This was for my husband's cousin. I only finished half of it... I'm notorious for UFOs! I made the short pleated apron and potholders from Amy Butler's InStitches book. I forgot to take a picture of the potholders.


AB Short Apron Terri II.JPG
Full Review Here