Showing posts with label sewing. Show all posts

Sunday, June 13, 2010

FO: Simplicity 2886 - The Sundress

I made this dress to wear to my little brother's graduation. It's a nice cotton sundress that was perfect for the Texas heat. I think it looks like a little girl's (around the age of 5) dress due to my fabric choices. It's cute, but I'm not sure it suits me... it's growing on me and the husband likes it. I've already worn it out in public twice in less than 2 weeks so that's a good sign. This also the first completed item for my Summer Essentials Sewalong. :)

IMG_0496.JPG

Pattern: Simplicity 2886
Fabric: Amy Butler's Lotus Collection Lacework in brown (main) and pink cotton (contrasting) both of which were from my stash :)

IMG_0480.JPG

Modifications:
  1. No elastic in the back bodice... used 2 darts instead to remove gaping.IMG_0497.JPG
  2. Used bodice from view C and skirt from view A.
  3. Used a 2" hem allowance.
Recommendations:
  1. Sew the pintucks down... otherwise you'll it will look uneven and you'll have to iron it every time and it will still look like this:
  2. IMG_0498.JPG
  3. Don't wait until the end to insert straps like it says in the instructions.
  4. Be careful with markings and the curves.
  5. Pins are your friends. :) I don't normally use very many of them, but they definitely helped on this one.
Please ignore my funny facial expression. I did have a picture where I was smiling, but it looks like I accidentally deleted it thinking that this was the correct one... boo! There's also some wrinkling due to wear. :)
IMG_0537.JPG

IMG_0541.JPG

I love the pleating on the skirt, which isn't too noticeable with my busy print, and the pockets on this dress! I do recommend this pattern... it makes for a great sundress.

Currently in progress:
- Kwik Sew 2689... pieces cut out and partially sewn
IMG_0483.JPG

- Burda 02-2010-104... traced
IMG_0494.JPG

Thursday, June 10, 2010

FO: iPhone Cozy Take II

I'm supposed to be working on my Summer Essentials Sew-Along, but I've took a little detour yesterday. Awhile back I made a wristlet / iPhone cozy... I liked it but knew I would need to make some changes for the next one. Here's my updated wristlet made for a friend.

IMG_0485.JPG

IMG_0484.JPG

IMG_0489.JPG

Pattern: my own
Fabric: Amy Butler's Daisy Chain and navy Kona cotton both leftover from other projects
Notions: d-ring, swivel hook, and pearl snap

I followed Tanya's suggestion about using pearl snaps... I definitely love more than the button!  Thanks, Tanya!  I already like this much more than my previous one, but I'm already thinking of some changes for Take III.

Monday, June 7, 2010

FO: Mother's Day Aprons

I originally had this post ready before Mother's Day, but it looks like the month of May just came and flew by...

2 aprons in 2 days for Mother's Day... my mommy (yes, I still call my mom mommy) and my mother-in-law.

Pattern: Mango Tango from A is for Apron
Fabric: quilting cottons from Joann in my stash... they were both leftover fabric from previous projects.
Notions: lots of bias tape

Apron 1:

IMG_0191.JPG
IMG_0192.JPG

Apron 2:

I really wasn't in the mood to model the apron for you, but I didn't know how else to photograph it... I didn't like how apron 1 was photographed, but it was mailed before I could retake the pictures... one of these days I'll get a dressform. Yes, I sew in a t-shirt and Jordan basketball shorts... it's so comfy and easy to get in and out of when I need to try on things. :)

MangoTango Take 2.jpg

There are some really neat aprons in this book, and I do want to eventually make some other ones, too. The above apron is designed by momomadeit. The only thing I disliked about the pattern is that you have to enlarge and piece it together. I may not have been doing it the best way, but I felt like I wasted lots of paper. It just wasn't efficient. Here's how one of the pattern pieces came out.

IMG_0194.JPG

Any suggestions for the future? Happy Sewing!

Saturday, May 8, 2010

FO: Simplicity 3538 Jacket

I decided to make my mom a jacket for Christmas and finally completed it about a month ago... oops! She knew about the jacket because I had brought it over for a fitting. I completed the jacket while I was in town and she was at work... leaving it in her bedroom while I came back home (in a different city). She called me later to say thank you and also to point out all my mistakes. My mom is a professional tailor and seamstress mind you... I knew I wasn't going to get away with anything. :)

Pattern: Simplicity 3538
Fabric: Off-white suiting and printed charmeuse from Joann with white cotton underlining.

S3538 Take I

S3538 Take I

I really like the versatility of this pattern. I do want to make this for myself with ruffles like many others did based on the JCrew Fiona jacket.

Some modifications and/or tips:
  1. I needed to underline the off-white suiting because the lining was visible from the outside.
  2. Don't line the jacket based on the pattern instructions! After reading many reviews, I should've bagged the lining as many suggested. However, since it was my first lining I thought I should proceed with the pattern instructions. This was no good... I had a hard time with the sleeves and did NOT like how it turned out on the inside.
  3. The sleeves are a little too skinny for my mom's (and my) arms, but we both have full arms.
If you do the lining their way this is what the sleeves look like before the bias tape...

S3538 Take I

I did reduce the seam allowance because the arms were a little tight and trimmed it evenly down, which made finishing with bias tape every difficult. I had to hand stitch the bias tape down, which I didn't mind, but it just looked homemade.  (The poly charmeuse unravels like crazy!)

I also don't like how the sleeve vents turned out... there's all fabric bunching going there.

S3538 Take I

I also finished the buttonholes a little too small.  The buttons do fit but it's not easy... oops!  The procrastinator that I am didn't have time to fix it.  :P  Sorry, mommy... I love you!  My first lined jacket complete!  I will definitely give this pattern another go, but just with some mods.

Sunday, April 25, 2010

FO: Easy Bolero

I need some spring outerwear to wear over my tanks and dresses. I had this pale blue rib knit from fabric.com since July 2006... I had one yard for $1.94. (Yay, another stash fabric used up!) I saw this easy bolero somewhere a few years and thought I'd finally give it a try. What do you think?

With brooch (my right sleeve is not laying correctly):
IMG_0007.JPG

Without brooch:
IMG_0017.JPG

Back (Hehe... I'm not sure why I'm crooked.):
IMG_0015.JPG

This dress is not handmade... I got from BCBG back in 2005. Not bad for $2, huh? As I was trying to figure out how to make this bolero, I made some mistakes and had to cut out my serged edges.

IMG_0021.JPG

Isn't it much prettier as a flower?
IMG_0023.JPG

The flower isn't actually sewn yet... I was just testing it out. I'm glad I can make use of my scraps... so nothing from this fabric is getting thrown out. :) Can't decide if I want to make it a headband or a brooch or both?

Saturday, April 24, 2010

FO: New Look 6470 Cowl Tank

New Look 6470 is one of the first patterns I purchased probably back in 2006... before I even took sewing lessons.  I took a stab at the skirt trying to teach myself how to sew... I didn't know there was a difference between woven and knit and that sewing pattern sizes are different than ready to wear sizes.  No wonder I was frustrated and decided to take sewing lessons a year later.

Well I didn't make or finish the skirt , but I did make view B, which is the cowl neck tank. It's only 2 pieces!! That's crazy!! :) This is a super easy tank, and I made it with the remnants from my recent Simplicity 3503 dress... yay for more stash busting. (I'm trying really hard not to acquire any new fabric and just use my huge stash... it's really hard with all the pretty fabric and spring inspiration.) I like how the two pieces fit on my left over fabric... I thought I wasn't going to be able to use it.

NL6470i.jpg
Picture taken at a church tennis tournament and it was super sunny. I was obviously not playing... I was the event photographer. :)

I would totally recommend this pattern. There are over 30 reviews of it on Pattern Review, and it's still available... it's not out of print based on the Simplicity website and some of the reviews are dated from 2005. I do want to make some of the other views, too.

Some notes on this pattern:
  1. I usually go one size down on Big 4 patterns, but based on the finished measurements I decided to go with my intended measured size. It is fit perfectly! Hehehe.. I guess they knew thing to two about a little less ease back then. :)
  2. The pattern does not have instructions to finish the raw edges. I don't mind this too much and it can be easily accommodated.  I did not spend the extra time to make the edges pretty because I wanted to finish before I went to bed. Overall, I think this pattern from tracing to sewing only took me a couple of hours to make.
  3. I love how versatile this top is! I can be dressy or casual.
  4. I added fusible hem tape to stabilize the fabric before I stitched.  I also added fusible hem tape to the neckline in order to keep the edge from flipping out.
  5. This is my SMOT #2!
IMG_0002.JPG

IMG_0003.JPG

Sunday, April 18, 2010

FO: Simplicity 4539 Top

I joined the Spring Month of Tops hosted by Faye. There are lots of great tops already posted on the blog. You should check out if you haven't already. Here's my first top for the month.

Pattern: Simplicity 4539 (out of print - OOP) view E
Fabric: from stash - melon spandex jersey from fabric.com @ $2.49/yd (ordered 3/25/08) Yay for stash busting!

IMG_2634.JPG

Below are some mistakes I made that could've been avoided if I went with my gut instinct.
  1. I read the cutting layout incorrectly and did not cut the front and back pieces on the correct grain. (i.e. there's no stretch across the width.) I even though I thought it was incorrect while I was cutting it, but didn't think to double check.  
  2. I put on the collar inside out. As I was pinning the collar, I thought that I should baste it first, but decided I was too lazy and just serged. (By the way, pinning fabric for the serger is different than pinning for the sewing machine... in case you didn't know. I don't want anyone ruining his/her serger.) I should've just basted, then I could of redone the collar.  From the picture above, you can tell that the collar seam will be visible from the outside.
  3. Even though I pinned the collar, some of the front fabric bunched up along the collar seam. You can see it better in the picture below.
IMG_2635.JPG

Despite all the mistakes, I still like the shirt and will still wear it.  Because of the incorrect layout it's a little tight across the bust and back.  You can see how it pulls and bunches across those areas.

S453901.jpg

S453902.jpg

Below are changes that I made and some recommendations:

  1. I didn't hem the top. I have a rather short torso and I liked the length without it being hemmed. Next time, I'll lengthen the top and top it. If you have regular or long torso, I would definitely recommend lengthen the pieces.
  2. My side seams were only 3/8" because there was no stretch, and it was going to be a little too tight with 5/8" seams.
  3. I didn't hem the collar... just because I didn't think it was necessary and I was being lazy.
  4. Double check and make sure you're cutting on the right grain.
  5. Go with your gut instincts!! :)
I think it's a great basic pattern. There's only 3 pattern pieces to this view, and it's SUPER easy. I will definitely be making this again... maybe again this month. :)

FO: Simplicity 3503 Dress

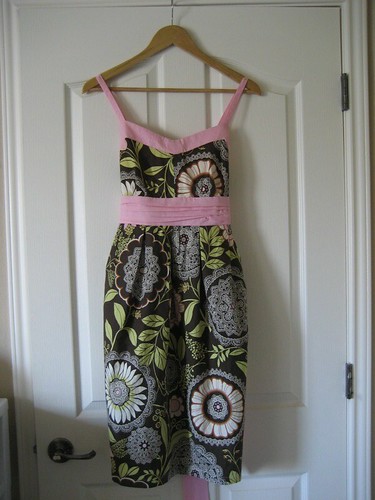
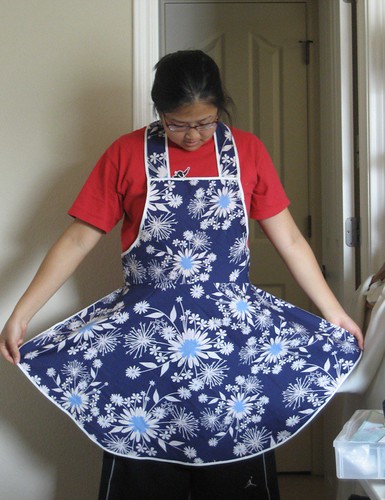
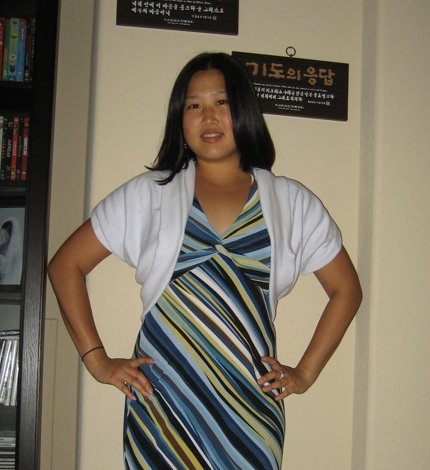
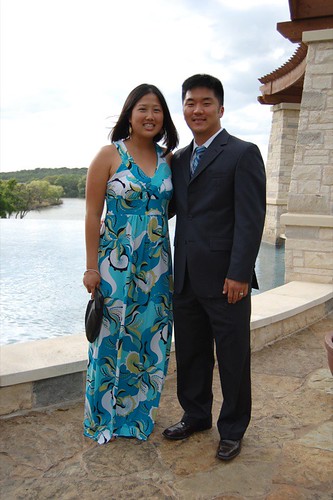
I haven't really done much sewing lately... I've seen such great inspiration through many blogs and planned so many things to sew, but when it came down to actually making it... I just didn't want to sew.  There was a wedding this past Saturday and I didn't have anything to wear. So of course, Friday night I decided to trace, cut, and sew a dress for the wedding the next day!  :)

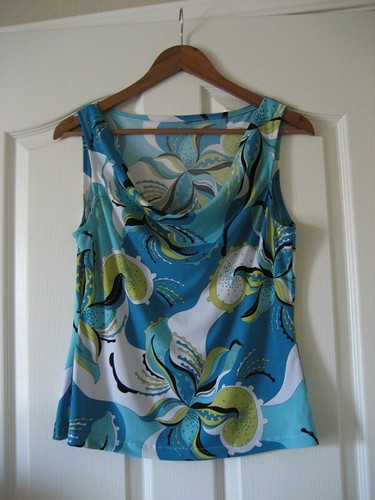
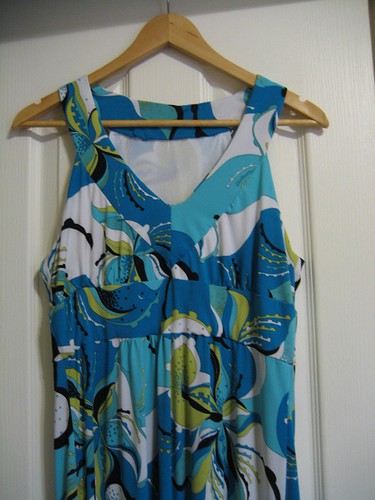
I used Simplicity 3503, which was 2009 best pattern on PR, and it's well deserved.  There's many great versions of it 
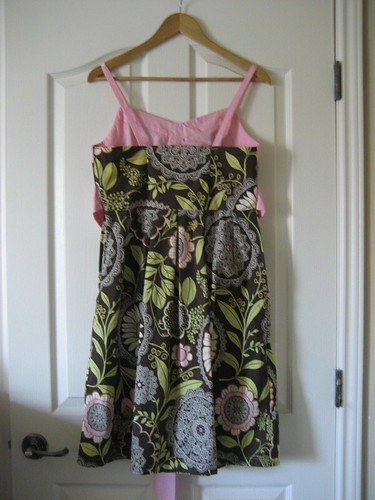
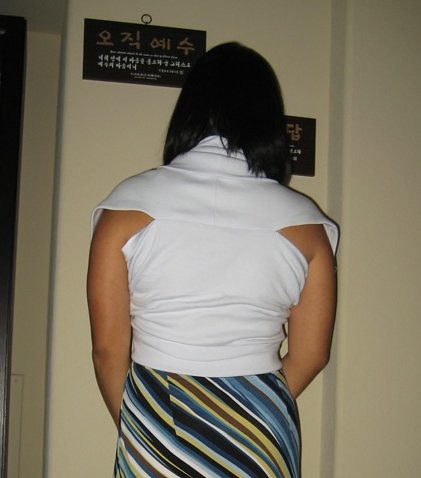
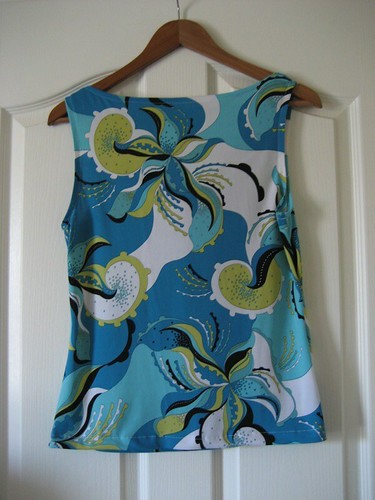
here.  I chose to make view E, which has good coverage in the back.

Pattern:  Simplicity 3503 View E
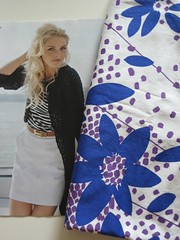
Fabric:  from the stash - Robert Kauffman knit from Hancock Fabric and nylon tricot from fabric.com

DSC_0958.JPG

I had a lot of firsts with this dress. I've listed them out below.
  1. I traced a Big 4 pattern. I usually just cut-out the tissue, but I need to grade down in size so I felt safer tracing the pattern. Also, I felt like I would reuse this pattern in the future and didn't want to ruin the original tissue pattern.
  2. I graded a size down. I bought this pattern awhile back... before my weight loss, and didn't have the size I needed.  I was really nervous about this, but it turned out pretty well. This dress was still a tad bit big, but I didn't mind. Since it was a knit, it was probably more forgiving of any mistakes that I made.
  3. I hand slip stitched the facings and linings. I didn't like the idea of hand sewing because I thought it was too time consuming, but it was actually therapeutic. The initial stitches weren't done correctly, but I eventually got the hang of it, and now I actually like to hand-sew! I never thought that I'd enjoy that process.
Some errors I made along the way:
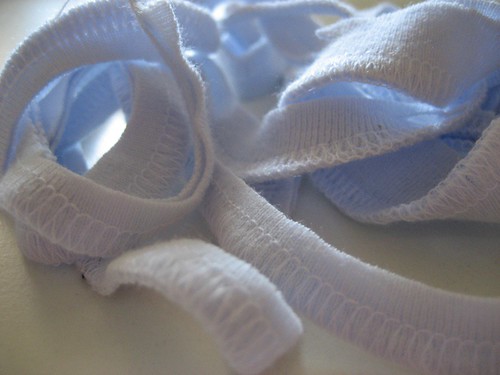
1. Do not iron nylon tricot!  See this big hole (look below)?? I forgot that it was made out of nylon and put the hot iron directly on top of it... bad idea. Luckily it is on the inside and it isn't TOO big.

IMG_2639.JPG

2. Instead of using tricot, I should've used the fashion fabric.  I little bit of the tricot can be seen on the outside, but you have to look closely.

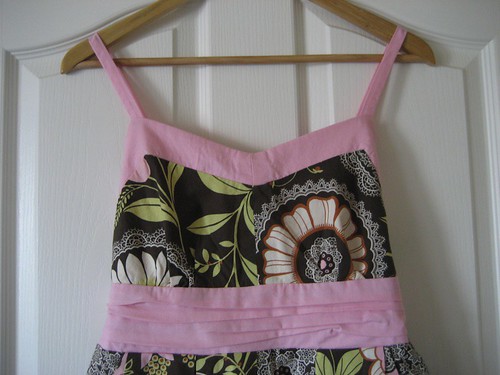
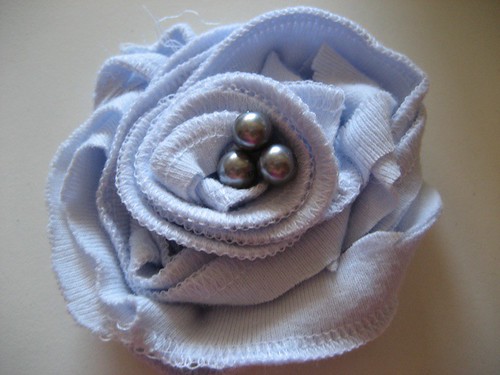
3. I would use a contrasting band like Eugenia's version.  I think that the band blends in too much with the dress... especially on the right side.

IMG_2642.JPG

Overall, I learned a great deal in making this dress. I surprised myself in finishing it, too, since I traced, graded down, cut-out, and sewed the dress all in less than 24 hours... I also got 7 hours of sleep.  I would definitely make this dress again, and I would recommend it to anyone that hasn't already made one. ^___^

I think I have a new perspective on sewing, too.  In the past I just wanted to finish an item and didn't really ENJOY the process of making it.  Hehe... I don't really know how to explain it... for example, I didn't like cutting out a pattern much less think about tracing a pattern. But much to my surprise, I liked every step in making this dress, and I think it's due to all the great sewing blogs I've been reading. They're so encouraging and helpful! Thanks! Hopefully, this is the beginning of getting back to sewing.

Wednesday, March 17, 2010

15 Min Skirt

I had some interlock knit leftover from my Butterick 5247 dress, which I decided I didn't like but more on that in the future.  I was holding onto the leftover fabric to make a top, but it turns out that it wasn't enough for what I was planning.  So instead I decided to cut it up and make a fitting pencil-like skirt with waistband.  It was all done on my serger in a matter of minutes.  I really like because it was simple and super comfy!  I think it could be dressed up or down.


Please excuse the wrinkles... 

I didn't take any measurements to cut out the skirt.  I took the panel of fabric and laid it across my body and then serged the sides. I also cutout a wide waistband.  The interlock had some stretch across the width so I had the waistband a little smaller than what it should've been.  Viola!  I'm very pleased with the results.


This skirt was done back in November, but I just didn't get around to taking any pictures until last month... :)

Tuesday, March 2, 2010

Cowboys External HD Case

There was left over Dallas Cowboys cotton from pjs that were made for my dad and father-in-law for Christmas.  I used these scraps to make a external hard drive case for my father-in-law's birthday last month.  I just winged the size of the case based on my external drive and online measurements of the actual HD.  In the end, it fit perfectly.


A large metal snap was used as a closure.  This was my first time installing this type of snap.  I don't think the tool was properly aligned, and it smashed a portion of the inside.  It still works, but isn't pretty... here's the peak inside the snap.


Here it is opened.  There's a pocket for the cable, too.  I couldn't resist adding my label.  ^__^


This is a picture with my HD and cable.  I eventually need to make a case for myself.  :)


I used all scrap fabric pieces for this item.  The exterior fabric is 100% cotton, with 100% cotton twill for the lining, and some sort of batting in between for a little cushion.

Thanks for you all your comments on my blog anniversary!  I really do appreciate them.  Don't forget to enter in my giveaway on my last post.  It's open through Sunday, March 7th.

Sunday, February 21, 2010

Simplicity 2601 Top I

Finally finished one Simplicity 2601 top.  (There is another one in progress in a different view.)  I had some leftover Amy Butler Daisy Chain from this dress.  I'm pretty happy with the way it turned out, but I was very frustrated while making this top.  All of the frustration was because I was trying to rush through the bias binding.  I should've ironed and taken it slowly... it would've helped if I used single fold bias tape instead of double, too.  Also, I'm not very good at loop turning.  Anyone have any suggestions?


I used covered buttons, and I love how they turned out.  Overall, it was a great pattern and top and I definitely do recommend it.  I do need a little break from it  for my second top since I need to get over my personal frustration with the top.

Oooo... another thing is that I joined stash busting hosted by Zoe.  I did get some fabric as a Valentine's present, but that doesn't count, right?  :) I am determined to go through more of my stash and not buy any more fabric.  I haven't decided what my limits would be yet... should it be by time or projects?  I think projects make more sense since I could go long periods of time without finishing projects.  How about finishing at least four projects with stash fabric before buying any new ones?  :)

Monday, January 4, 2010

2009 FO: Vogue 2980 Top

I finished this top sometime in December.  I used Sandra Betzina's Vogue 2980, which is the popular faux bolero top.  I love this top!  I was a little worried about the sizing on this pattern since it's mentioned several times in the reviews.  I went with my bust measurement, which gave me more leeway in the waist.  This leeway was definitely needed!


The only changed I made was not hemming the bottom of the shirt.  I used fusible tape, but I may need to go ahead and hem it since it's not staying very well.  We'll see how it is through the wash.  There are a couple more things that were finished before the end of 2009, but they'll have to wait since they're going through the wash.

Sewing machine update:  It's not fixed.  I'm borrowing my FIL's at the moment.

Thursday, November 19, 2009

Simplicity 2603 Cardi Wrap

I made the Simplicity 2603 wrap cardigan a couple of months ago.  I've already worn it a few times, but didn't get a chance to take any pictures until recently.  (This is the cardigan wrap that is the DKNY cozy knockoff.)  There are many ways to wear it, but these are my favorite.  Hahaha... I think my poses are awkward... oh well.


There are a ton of reviews on PatternReview.com here.  I LoVE this cardigan, and I will definitely be making it again.  I love the bold colors in the DKNY spread that Adrienne found... I just need to find the right colored drapey knit.

Some things I changed from the pattern are not adding the elastic at the neck and not hemming the edges.  Next time, I will make the sleeves full length... I tried to attach the bottom part of the sleeve but the seam was too bulky.  I ended up cutting it out.

Wednesday, November 4, 2009

Burda Magazine

I ordered a Burda magazine from the classified section of Patternreview.com.  I've admired many peoples creations from this magazine.  It's the November 2009 issue.  This is my first one and I'm pretty excited about it.  It seems to be a little bit more work since you have to trace out the patterns and then cut them out, but it'll be a different experience.


Hmmm... what to try as my first Burda pattern?!

New Clutch

I change bags/purses about 3-4 times a week... on days I have classes I use my backpack, on Sunday's I use my messanger bag, and the rest of the week I use whatever bag fits my mood.  With all this bag changing I needed a clutch or something to hold my essentials, which are phone, wallet, and chapstick, otherwise I would end up forgetting something.  A few weeks ago I made a little clutch.


I made some labels, too!  :)


Mihee is my Korean name... it means beauty and joy.  I thought it was appropriate for this clutch and hopefully my other sewing projects.  :) The labels are made from twill tape and printable iron-on transfer.  I had read about it somewhere awhile ago and can't remember where I saw it.  I believe there are lots of different tutorials on the web about this method.

I think I may make some more clutches for Christmas gifts... but I will need to add interfacing and use a different closure... the button is inconvenient and a little annoying.